Ruby, with its elegant syntax and powerful features, has long been a favorite among developers for building web applications, scripting, and more. Central to the efficiency and flexibility of Ruby development are two essential tools: Ruby gems and Bundler. In this guide, we embark on a journey to unravel the mysteries of Ruby gems and explore the capabilities of Bundler.
From understanding the fundamentals of gems to mastering dependency management with Bundler, we’ll equip you with the knowledge and skills needed to streamline your Ruby development workflow. Get ready to unlock the full potential of Ruby programming as we delve deep into the world of gems and Bundler.
Ruby Gems Unveiled
RubyGems is a package manager for the Ruby programming language. It serves as a distribution mechanism for Ruby libraries and applications in a format called “gems.” RubyGems allows developers to easily manage dependencies, install, and distribute Ruby code.
Here are some key aspects of RubyGems:
- Package Management: RubyGems provides a centralized repository of Ruby libraries and applications. Developers can publish their Ruby code as gems to share with others;
- Dependency Management: Gems can specify dependencies on other gems, including specific versions. When you install a gem, RubyGems automatically installs any required dependencies;
- Installation: RubyGems is bundled with Ruby by default, so it’s typically available whenever you install Ruby on your system. You can install gems using the gem command-line tool, which comes with RubyGems;
- Gemfile and Bundler: In Ruby projects, developers often use a Gemfile to specify dependencies for their project. Bundler is a tool that works with RubyGems to manage these dependencies, ensuring that the correct versions are installed for a given project;
- Versioning: Gems follow the Semantic Versioning scheme (SemVer), where each version number consists of three parts: MAJOR.MINOR.PATCH. This allows developers to specify gem dependencies with precision, ensuring compatibility;
- Publishing: Developers can publish their own gems to the RubyGems repository by creating an account, building their gem, and using the gem push command to upload it;
- Community: RubyGems has a vibrant community of developers who contribute gems for various purposes, ranging from web development frameworks like Rails and Sinatra to utility libraries for tasks such as handling JSON or interacting with databases;
- Open Source: RubyGems itself is open-source software, maintained by contributors from the Ruby community. This open nature encourages collaboration and improvement over time.
Overall, RubyGems simplifies the process of managing dependencies and distributing Ruby code, making it easier for developers to build and share software in the Ruby ecosystem.
ruby

# Example: Installing a gem gem install devise
Ruby gems are encapsulated packages of code that extend Ruby programs’ functionality. Let’s consider an example where we install the ‘devise’ gem, which provides authentication features for Rails applications. Gems facilitate code sharing within the Ruby community and offer solutions for various programming tasks.
Understanding Gem Structures
Understanding the structure of Ruby gems is essential for both consuming existing gems and creating your own. Here’s a breakdown of the typical structure of a Ruby gem:
- Gemspec: The gemspec file (*.gemspec) is the specification for your gem. It contains metadata such as the gem’s name, version, dependencies, authors, and a list of files to be included in the gem. The gemspec is written in Ruby and is typically located at the root of the gem’s directory;
- Lib Directory: The lib directory contains the main source code for the gem. Ruby files within this directory define the classes, modules, and other code provided by the gem. When you require the gem in your Ruby code, it’s the files within the lib directory that get loaded;
- Bin Directory (Optional): The bin directory is where executable files related to the gem are stored. If your gem provides command-line utilities, you can place them here. These scripts should have a shebang line (#!/usr/bin/env ruby) at the top and be made executable;
- Documentation: Gems often include documentation for users and developers. This documentation may be in the form of README files (README.md, README.txt, etc.), which provide an overview of the gem, usage instructions, and other relevant information;
- Tests: Testing is crucial for ensuring the quality and reliability of a gem. The test or spec directory typically contains test files written using testing frameworks like Minitest or RSpec. These tests verify that the gem behaves as expected under various conditions;
- Examples (Optional): Some gems include an examples directory containing sample code or usage examples to help users understand how to use the gem in their own projects;
- Configuration Files (Optional): Depending on the complexity of the gem, it might include configuration files (config directory) that users can customize to tailor the behavior of the gem to their needs.
- Assets (Optional): If your gem includes static assets such as images, stylesheets, or JavaScript files, you might include them in directories like assets, stylesheets, or javascripts.
- Other Files: Besides these common directories, a gem might include other files or directories as needed for its functionality. For instance, if the gem interacts with a database, it might include a directory for migrations or database configuration.
Understanding the structure of gems is beneficial when working with them, whether you’re using existing gems in your projects or creating your own to share with the Ruby community.
ruby

# Example: Creating a gem structure bundle gem my_gem
To understand gems better, let’s create our own gem structure using the ‘bundle gem’ command. This command generates the essential files and directories needed for a gem, including the gemspec file, lib directory, and test suite.
Advanced Gemfile Techniques
Advanced Gemfile techniques can help you manage dependencies more efficiently and tailor them to your specific needs. Here are some advanced techniques you can use in your Gemfile:
- Conditional Gem Loading: You can specify gems to be loaded conditionally based on the environment or other factors. For example, you might want to include development or testing gems only in certain environments. You can achieve this using the :group option in your Gemfile:
- ruby
- group :development, :test do gem ‘pry’ gem ‘rspec’ end
- Source and Version Constraints: You can specify the source of a gem and version constraints to control which version of a gem is installed. This is useful when you want to use gems from sources other than RubyGems.org or when you need to ensure compatibility with specific versions of a gem. For example:
- ruby
- source ‘https://rubygems.org’ gem ‘rails’, ‘~> 6.0’ gem ‘pg’, github: ‘ged/ruby-pg’, ref: ‘master’
- Local Gem Paths: You can specify local paths for gems, which is useful for developing gems locally without publishing them to RubyGems.org. This allows you to test changes to gems in your application without having to repeatedly push new versions. For example:
- ruby
- gem ‘my_gem’, path: ‘~/projects/my_gem’
- Git Repositories: You can specify gems from Git repositories, allowing you to use gems that are not published to RubyGems.org or to use specific branches or commits. This is useful for testing changes to gems before they are released. For example:
- ruby
- gem ‘my_gem’, git: ‘https://github.com/user/my_gem.git’, branch: ‘feature_branch’
- Custom Gems: You can define custom gems within your Gemfile using the gemspec method. This allows you to define gems that are not published to RubyGems.org but are instead built and managed within your project. For example:
- ruby
- gemspec path: ‘path/to/custom_gem.gemspec’
- Locking Gem Versions: You can lock gem versions to ensure that your application uses specific versions of gems, preventing unexpected updates that might introduce compatibility issues. You can do this by running bundle lock after specifying your dependencies in the Gemfile.
These advanced Gemfile techniques give you more control over managing dependencies in your Ruby projects, allowing you to customize your dependencies based on your specific requirements and workflows.
Optimizing Workflow with Gem and Bundler Commands
Optimizing your workflow with gem and Bundler commands can greatly enhance your productivity when working on Ruby projects. Here are some tips to streamline your workflow:
Gem Commands:
- gem install: Use gem install to install gems globally on your system. However, it’s generally recommended to use Bundler and a Gemfile for project-specific dependencies;
- gem update: Keep your installed gems up-to-date with gem update. However, exercise caution in updating gems, as it might introduce breaking changes or compatibility issues with your project;
- gem list: Use gem list to see which gems are installed on your system;
- gem search: Search for gems on RubyGems.org using gem search. This can help you find new gems or check if a gem exists for a particular functionality;
- gem uninstall: Remove gems from your system with gem uninstall.
Bundler Commands:
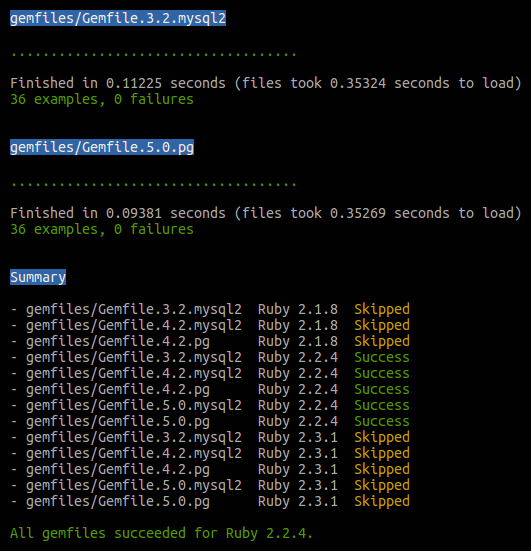
- bundle install: Use bundle install to install gems specified in your Gemfile. Bundler will resolve dependencies and ensure that the correct versions of gems are installed for your project;
- bundle update: Update gems in your Gemfile to their latest versions using bundle update. This command will update gems while respecting version constraints specified in your Gemfile;
- bundle exec: Prefix commands with bundle exec to run them in the context of your project’s gem environment. This ensures that the correct versions of gems specified in your Gemfile are used;
- bundle exec rake: Run Rake tasks within your project using bundle exec rake. This ensures that any dependencies specified in your Gemfile are loaded correctly;
- bundle console: Launch an interactive console with your project’s gem environment loaded using bundle console. This is useful for experimenting with gems or debugging issues within your project;
- bundle exec –gemfile=other/Gemfile: Specify a different Gemfile to use when running Bundler commands. This is helpful when working with multiple projects or when you need to use a custom Gemfile for a specific environment.
Gemfile Optimization:
- Group Gems Appropriately: Group gems in your Gemfile based on their purpose or usage (e.g., development, testing, production). This improves readability and allows for conditional loading of gems;
- Use Source and Version Constraints: Specify the source and version constraints for gems in your Gemfile to ensure consistency and reliability across different environments;
- Bundle Install with –deployment: When deploying your application, use bundle install –deployment to ensure that only the gems specified in your Gemfile.lock are installed, avoiding any surprises due to gem version discrepancies;
- Regularly Update Dependencies: Keep your project’s dependencies up-to-date by periodically running bundle update. This ensures that you benefit from bug fixes, security patches, and new features provided by updated gems.
By leveraging these gem and Bundler commands effectively and optimizing your Gemfile, you can streamline your workflow and ensure smooth development, testing, and deployment of Ruby projects.
Conclusion
Ruby gems and Bundler stand as indispensable pillars of the Ruby development ecosystem. Through this exploration, we’ve uncovered the underlying mechanisms of gems, learned how to create and manage them effectively, and harnessed the power of Bundler for seamless dependency management.
Armed with this knowledge, you are now equipped to navigate the intricacies of Ruby development with confidence and efficiency. As you continue your journey in Ruby programming, remember to leverage the versatility of gems and the robustness of Bundler to propel your projects to new heights of success. Happy coding!